I am considering posting a tutorial for this project if I get ten or more requests. It's really very easy to do!
I am considering posting a tutorial for this project if I get ten or more requests. It's really very easy to do!
I reworked the bird late last night and got the result below...I don't know for sure if it's an improvement or not. You can tell the photos were taken in very different lighting.
I love participating in this kind of swap. It's a great way to fill my studio with original art from around the world. This card will be making its lovely way to Argentina this week! Thanks to the Great Big Stitched Postcard Swap.
Digital Kits Used: Jessica Sprague, EchoesofAsia, "Dark Blue Solid"; Design House Digital Fall Blog hop, Deena Rutter (yellow zig zag), Design House Digital Fall Blog hop, Jen Allyson (plaid papers)
Fonts: kevinandmanda.com "boring showers", "mr. & mrs. popsicle"
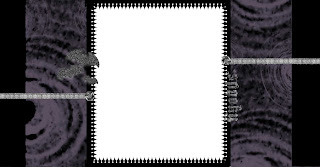
2-Column Blog Background

http://www.rhymereason.com/digitaldownloads/HauntedBlog2COL_BKGD.jpg
~or~
3-Column Blog Background
http://www.rhymereason.com/digitaldownloads/HauntedBlogBKGD.jpg
To use one of this blog background for the first time, follow these steps:
1. The first time you use a blog background, you should set your blog template to 'Minima.' To do this, log in to to your blog and click on 'customize' in the top right corner.
2. Now that you're in the 'customize' screen, click on the 'Pick New Template' tab in the upper left part of the screen. Click on 'Minima.' (The first one there, not Minima Ochre, or Blue, just plain white Minima.) Then save that template choice. (You won't have to do this every time you use add a blog background from my blog, just the first time.)
3. Next, click back onto the 'page elements' tab.
4. Click on 'add a gadget' (in the right column)
5. Then find the 'html/java script' option and click on that.
6. Copy and paste this code into the content:
<style>body {background-image: url(direct link); background-position: center; background-repeat: no-repeat; background-attachment: fixed; }</style>
7. Now, find your favorite background from my site, and copy and paste the link below it between the parenthesis where it says (direct link) (make sure and leave the parentheses there. Just copy and paste the "direct link" text)
8. Click "save" and you're done!
To change your background just 'edit' the html/java script gadget that originally used to add the background and then change the direct link like you did the first time. Voilá! It's finished!
~ Free ~ Creative Commons ~ By Attribution ~ Please consider adding a link to my blog wherever you post designs using any of my products. Available for download under a Creative Commons license.
I took the summer off but I'm ready and rarin' to go now. I just posted a new kit in my Etsy store just in time for Halloween. I won't be updating this blog very often, but will still use it from time to time to post freebies. Please hop on over to my new blog and check it out:
~ Free ~ Creative Commons ~ By Attribution ~
Please consider adding a link to my blog wherever you post designs using any of my products. Available for download under a Creative Commons license.
Today I just wanted to direct your attention to Digital Scrapbook Faves, a website that tracks and posts digital scrapbooking freebies from all over the web. I have applied to be added to their database, so look for me there from time to time! :)
**NOTE** I just fixed this link at about 11:07AM Mountain time. There was a misspelling in the link.
http://www.kevinandamanda.com
They also show you how to change the titles in your blog to more exciting font styles. It looks like it's a little complicated and time-consuming to set up, but worth it if you can't afford your own web designer! Here's the link.
http://www.kevinandamanda.com/whatsnew/tutorials/how-to-use-a-cute-font-for-your-blogger-post-titles.html
In order to share it without copyright infringements, I have switched the paper to my own paper and made a few other adjustments. I also reverted to the original font I used on the liner. You can download the layered Photoshop file below. This layout could be used for a future Christmas card, or as an CD liner like ours.


